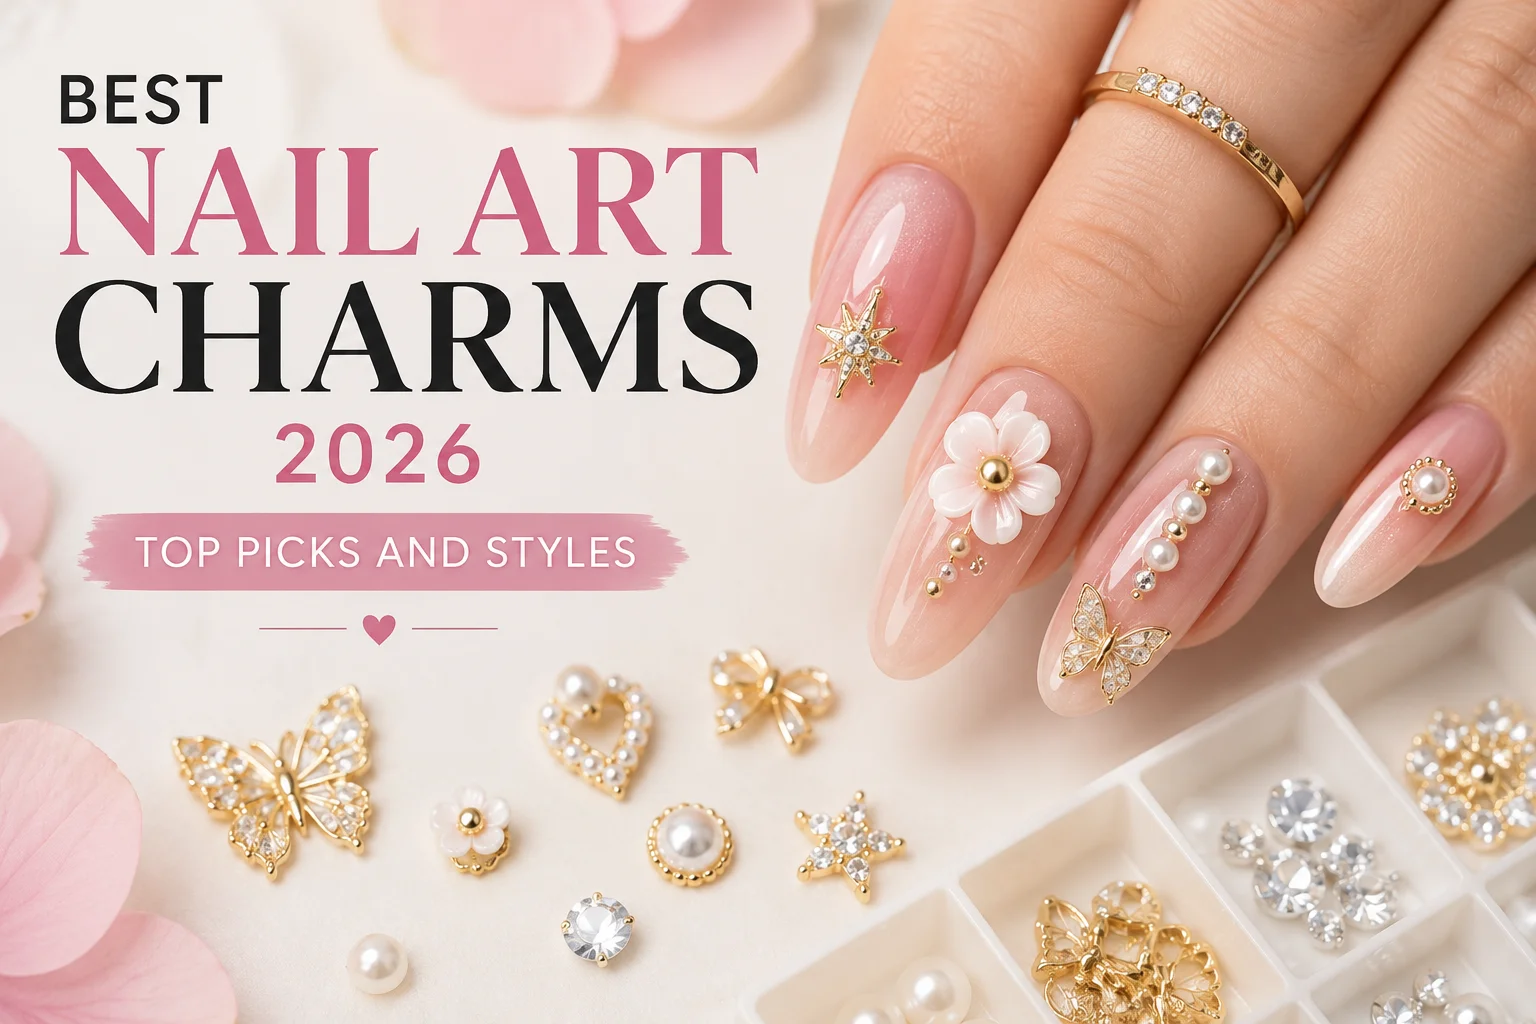
Small decorative pieces that sit on top of a finished nail. Not stickers, not painted designs, actual three-dimensional objects with weight, texture, and height above the nail surface.
That raised quality is the whole point. Light hits a 3D flower charm or a rhinestone cluster from multiple angles. The result looks different from every direction you hold your hand. A flat nail sticker catches light from one angle only and reads as printed design under close inspection. Charms never have that problem because the dimension is real, not printed.
The range covers everything from tiny single rhinestones to large butterfly wings and layered pearl clusters. Each type creates a different effect and suits different nail lengths, shapes, and base designs. Getting that match right is what separates a charm nail that looks professional from one that looks overdone.
Why Nail Art Charms Work Better Than Nail Stickers
Stickers stick straight out of the nail. That flatness is evident under strong light or in photographs. The design will show but there will be no depth behind it, no texture, nothing that will change as the hand moves.
That isn’t a problem for charms. The rhinestone cluster reflects various lights in different angles. The 3D flower has a tiny shadow at the bottom that makes it seem like it was actually nailed onto the nail, and not stuck on top. Butterfly charm has a real length from front to back that matches the way the charm looks in photographs.
The difference between the two is in practice. Stickers for colour and pattern. Charms give dimension, movement and a nail art that most people don’t consider to be for home use. Charms are the right tool for anyone who desires nails that actually resemble custom-designed rather than decorated nails.
Types of Nail Art Charms
Most people begin with rhinestone nail charms, and it’s for a reason. Stones used in clusters or starbursts or used as a single accent stone will be effective on all nail types ranging from exceedingly short almond nails to long coffin nails. Fine enough to not be obvious on a short set, yet refined to appear purposeful on a longer one. Rhinestones catch light from all angles making them always look great in photos and in person.
3D nail charms cover raised flowers, bows, hearts, shells, and layered petal designs. These have the strongest visual impact of any charm category but require slightly more care during placement because the raised structure needs to sit flat against the nail without tipping. A flower charm that sits at an angle looks unfinished. The same charm placed flat and sealed at the edges looks like it was done in a salon.
Acrylic nail charms are built specifically for use on Acrylic Nails sets. The construction is slightly heavier than standard charms which suits the rigid acrylic surface. Lighter charms can shift on a hard base before the adhesive fully sets. Acrylic-specific charms are weighted to stay in position during the bonding window.
Star and moon charms have moved from seasonal to year-round. They work on dark bases, nude bases, and French tip designs without competing with the background. The flat underside of most star charms sits cleanly against any nail surface which makes them the most forgiving charm type for first-time users. One star placed correctly on a short French tip press on a nail looks intentional without requiring any additional nail art skill.
Butterfly nail charms are the most searched charm style going into summer 2026. The winged shape needs room to spread which means medium to long almond nails are the most practical base. On a short nail a butterfly charm crowds the entire surface. On a medium almond it sits centered with visible space around it that makes the design read as considered rather than crammed.
Pearl charms are the quiet option that consistently outperforms expectations. A single pearl at the center of a short almond press on nail on a clean nude base looks more polished than most nail art that takes significantly longer to complete. Pearl clusters on sheer or jelly bases are consistently some of the most saved nail looks across nail art communities because the combination reads as expensive without being complicated.
Best Nail Shapes for Nail Art Charms
Short Press On Nails suit single small charms or minimal rhinestone accents. One rhinestone centered on the nail, one small flower per finger, or a tiny star near the tip all work at short length without crowding the nail surface. The key at short length is restraint. One charm per nail reads as intentional. Three charms on a short nail reads as cluttered.
Short almond press on nails are the best all-round base for nail art charms. The wider nail bed at the center gives the charm a stable flat surface to bond against. The tapered tip frames whatever sits at the center without competing with it visually. Most professional nail art charm photos are shot on almond shapes because the proportions work across every charm size and type.
Acrylic press on nails hold charms longer than soft gel alternatives because the rigid shell does not flex under the charm weight during daily use. A soft gel nail bends slightly during regular hand movements. That flex puts stress on the charm base repeatedly throughout the day. Acrylic does not move, which means the bond at the charm base stays undisturbed.
Medium and long almond nails handle larger charm designs, clusters, and multi-charm layouts that shorter formats cannot fit without looking overcrowded. A three-charm cluster that looks editorial on a medium almond looks overwhelming on a short square. Matching charm size and quantity to nail length is the most overlooked part of charm nail design.
How to Apply Nail Art Charms
Tweezers first. Not fingers. Oil from skin transfers onto both the charm and the nail surface in under a second. That oil sits between the charm base and the adhesive and weakens the bond before it even starts setting. Every early charm failure that gets blamed on a cheap product is usually an oil contamination problem at the point of placement.
On gel nails: Apply gel top coat as normal but do not cure it yet. The tacky uncured surface is what the charm bonds into. Press the charm into position with tweezers, hold for ten seconds to let it settle, then cure under the lamp with the charm in place. The gel hardens around the base of the charm and locks it against the nail surface. After the first cure, apply a second thin layer of top coat around the perimeter of the charm base, not over the top of it, and cure again. This second layer seals the edges where lifting starts.
On press on nails: Place a small precise dot of nail glue exactly where the charm will sit. Pick up the charm with tweezers immediately and press it down. Hold for fifteen to twenty seconds with steady pressure. After the glue has set, apply a thin layer of gel top coat or additional nail glue around the base of the charm to seal the perimeter. This edge seal is what separates a charm that lasts two weeks from one that catches on something and lifts by day three.
Before applying press on nails: Lightly buff the surface of the false nail where the charm will go. Apply glue, place the charm with tweezers, hold, and let it set completely before applying the nail to the finger. This approach gives the most control over exact placement and produces the cleanest finished result because the nail is lying flat during the entire charm application process.
Nail Art Charm Designs Trending in 2026
Flower clusters on nude almond nails are consistently one of the most saved nail looks on Pinterest right now. Three or four small 3D flower charms grouped toward the base of a clean nude almond nail creates a result that reads as professional nail art. The grouping matters. Scattered randomly across the nail looks unplanned. Clustered toward one area looks designed.
Single rhinestone on a French tip. One stone placed at the apex of the white tip. Nothing else on the nail. That single point of light reflection against a clean French design is exactly the kind of restrained detail that photographs well and holds up in person. Short French tip press on nails with one rhinestone accent are pulling consistent engagement across nail boards this year.
Star charms on dark bases work across autumn, winter, and any evening occasion. Deep green, burgundy, navy, and black bases all let star charms read clearly without the charm getting lost in the base color. A scatter of small stars across a dark base creates a celestial nail look without any additional painting or art skills required beyond correct charm placement.
Butterfly charms on sheer bases are the top performing combination heading into summer 2026. A single butterfly charm sitting centered on a barely-there pink or jelly nude base creates an editorial nail look with one charm and a clean base. Nothing else needed.
Common Mistakes With Nail Art Charms
Placing charms too close to the cuticle is the most common layout mistake. Nail growth pushes the charm forward over the first week of wear. A charm placed right at the base of the nail starts looking misplaced by day five. Keep charms centered on the nail or positioned toward the tip where growth affects the placement less.
Too much glue creates a visible ring around the charm base as it hardens. That ring is immediately obvious under any lighting and makes even a well-placed charm look amateurish. A small precise dot directly under the charm footprint is the correct amount. The glue spreads slightly when the charm presses down, which is all the coverage needed.
Skipping the edge seal is how most charms start lifting early. The perimeter of the charm base is the weakest point of the bond, not the center. Sealing that perimeter with a thin layer of top coat after the charm has set adds significant wear time and prevents the catching and lifting that happens when the edge is left exposed.
Using fingers instead of tweezers causes more early charm failure than any other single mistake. The oil problem is immediate and invisible, which is why people continue to use fingers and blame the charm quality rather than the application. Switch to tweezers once and the difference in hold time is immediately clear.
Nail Charms at Nail Perk
Every Nail Charms listed on Nail Perk links directly to its verified Amazon listing. The collection covers rhinestone clusters, 3D flower charms, butterfly designs, star and moon sets, and pearl accents across multiple size and color options. Browse alongside press on nails, short press on nails, almond nails, and acrylic nail kits for a complete at-home nail art setup.
FAQs
What are nail art charms?
Small three-dimensional decorative pieces applied on top of a finished nail. They sit raised above the surface and add depth and dimension that flat stickers and painted designs cannot replicate.
How do you apply nail art charms without them falling off?
Use tweezers, never fingers. On gel nails press into a tacky uncured top coat and cure with the charm in place. On press on nails use nail glue and seal the charm edges with top coat after placement.
How long do nail art charms last?
On gel nails with proper placement and edge sealing, charms last as long as the manicure itself. Pressing on nails with nail glue and sealed edges, two weeks is achievable with correct technique.
What nail shape works best for nail art charms?
Short almond and medium almond press on nails provide the most stable flat surface for charm placement and suit the widest range of charm sizes and designs.
Can you put nail art charms on short press on nails?
Yes. Small rhinestones, single star charms, and individual flower accents work well on short nails. Keep one charm per nail at short length to avoid overcrowding the surface.
For more on 3D nail charm application techniques and top picks, read our complete guide here: https://nailperk.com/3d-nail-charms/