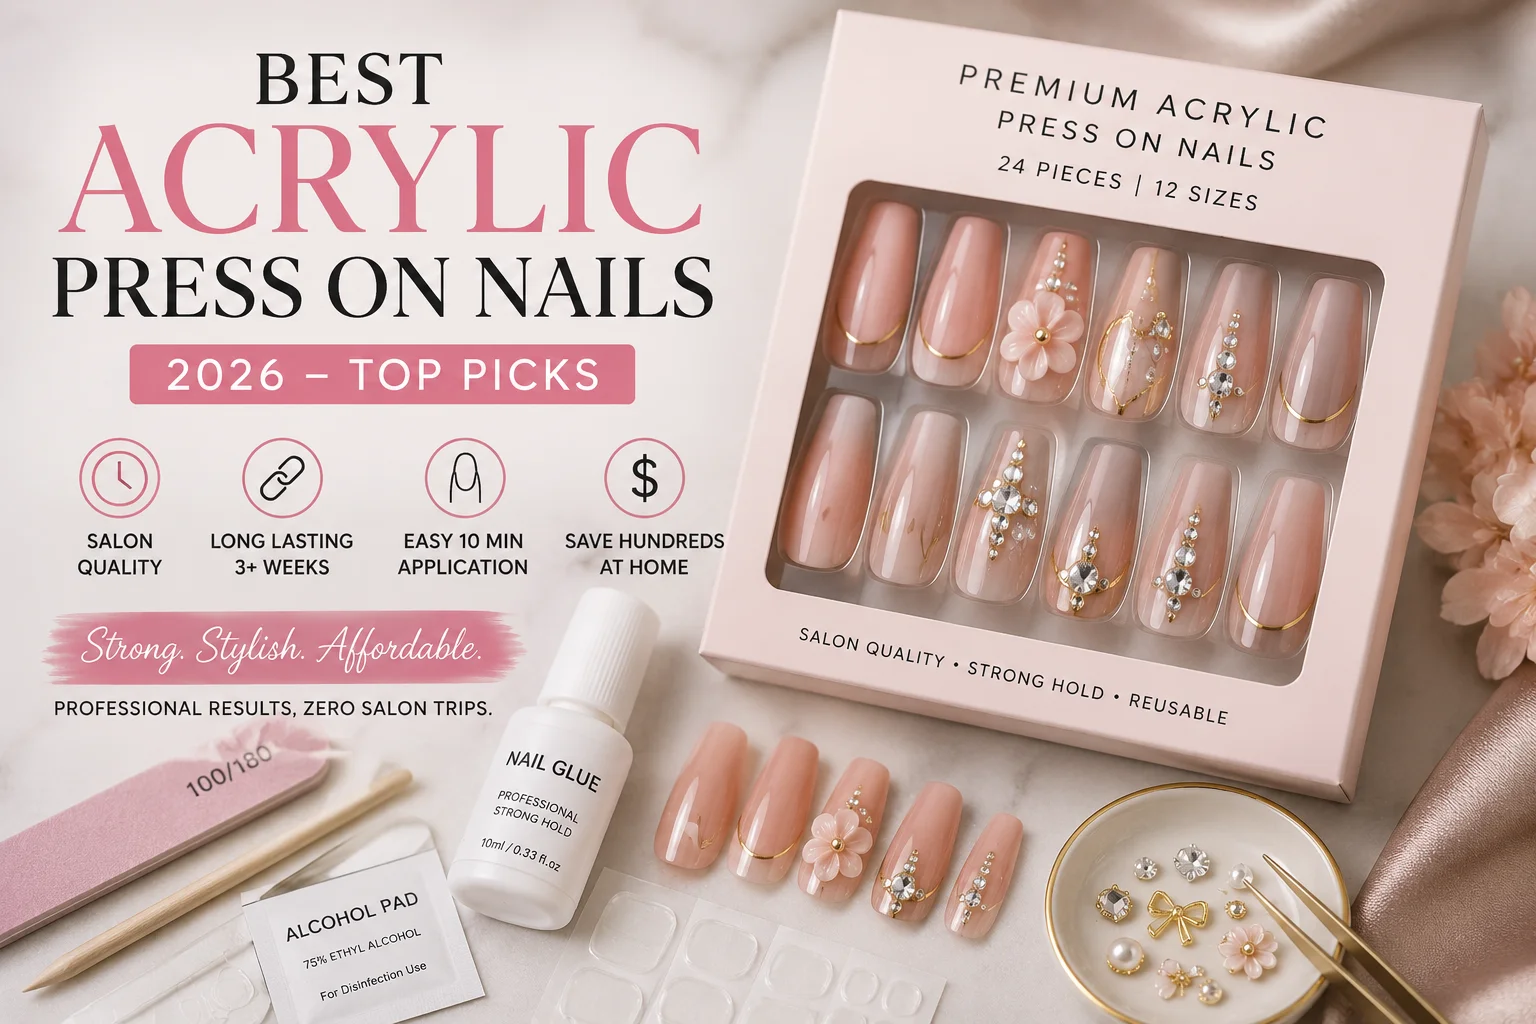
Spending hundreds of dollars at a luxury salon every month feels exhausting. Sitting in a chair for two hours while a tech drills your fingers ruins your weekend relaxation. Traditional salon sessions for professional Acrylic Nails drain your wallet and damage your natural nail plates over time. High-quality acrylic press on nails offer the exact same rock-hard durability and thick structure at home in ten minutes. This guide covers the best kits, pricing truths, and application secrets to get a flawless look.
Understanding the Material: Gel vs Acrylic Press Ons
You must know exactly what material you are buying for your fingertips. Beginners often get confused because both options promise long-lasting wear online. The real difference lies in the thickness and stiffness of the plastic compound.
Standard gel options use a softer, highly flexible material. This design makes them light and comfortable on your hands. However, they lack the rigid structure that heavy-handed people need to feel secure. Gel tips can bend backwards when you perform heavy tasks, which weakens the bond.
True acrylic variations use a dense, molded polymer blend. This compound mimics the thickness of real salon powder and liquid applications. The tip forms a sturdy, unbending shield over your real finger. If you prefer the hard, bulletproof feel of salon extensions, acrylic kits are the only choice that will satisfy you.
Breaking Down the Real Acrylic Nails Cost
The main reason why people dump their nail technicians is the massive financial savings. When you calculate the true acrylic nails cost over a full year, the numbers are eye-opening. A typical salon visit requires a serious long-term investment.
Expense Type
Salon Acrylic Services
Premium Press On Kits
Initial Full Set Price
$60 to $120
$15 to $25
Maintenance Cost
$40 to $60 every three weeks
$0 (No fills needed)
Hidden Travel and Tips
$15 per visit
$0
Yearly Total Cost
$1,200 to $2,000
$180 to $300
A professional salon set demands regular maintenance every two to three weeks to fix growth gaps. If you skip an appointment, your natural nails suffer from uneven weight distribution. You also spend extra money on gas, parking, and removal services.
A premium best acrylic nail kit costs less than a single salon tip. These retail boxes contain up to thirty individual pieces. This generous sizing choice ensures you get a perfect fit with plenty of extra replacement pieces left over. You save over fifteen hundred dollars a year while gaining the freedom to change designs whenever you want.
The Common Types of Acrylic Nails Available
The modern beauty market provides several options for your home manicure. Navigating the various types of acrylic nails helps you match your personal style and daily schedule.
Pre-Designed Factory Tips
These are the standard boxes you find in regular retail stores. Manufacturers print the paint, glitter gradients, and French lines directly onto the plastic during production. They work perfectly for quick events where you need a finished look immediately. You do not have to spend time waiting for wet polish layers to dry.
Hand-Painted Custom Tips
Independent nail artists create these premium products using high-quality supplies. The artist takes a raw acrylic blank and paints real layers of salon gel polish onto the surface. They cost more than factory boxes but look identical to a true salon service. The multiple layers of cured gel add extra strength and a rich color depth.
Blank DIY Full Cover Tips
If you love painting your own hands, buying bulk boxes of clear or nude bases is the ultimate budget move. These raw types of acrylic nails arrive without any polish or design. You clip, file, and paint them at your desk using your personal collection of lacquers and UV lamps. This option allows you to test custom color mixing without paying boutique prices.
How to Spot the Best Acrylic Nail Kit
You should look past pretty packaging designs when shopping online. A truly top-rated product must provide a complete system for a clean application. Check the specific components inside the box before spending your money.
Sizing variety matters more than anything else. Your natural nail beds have unique shapes from side wall to side wall. A cheap kit only offers ten or twelve pieces, which forces you to wear sizes that are too wide or too narrow. Look for packs that provide twenty-four to thirty tips marked with size numbers under the front edge.
The included tools also dictate the value of the kit. A great kit must feature a double-sided file, a wooden stick for cuticle preparation, and double-sided adhesive tabs. It must also include a secure bottle of professional-grade bonding agent. If a box contains a cheap, watery glue capsule, you should purchase a separate high-quality adhesive.
Step-by-Step Guide for a Three-Week Hold
Your preparation technique determines how long your temporary manicure stays attached. Even the most expensive tips will pop off in forty-eight hours if you rush the application. Follow this clean protocol to ensure your extensions stay secure for weeks.
Cleanse and Dehydrate the Plates
Wash your hands thoroughly with grease-cutting soap and warm water. Dry your fingers completely with a clean towel. Wipe every single nail plate with a fresh alcohol pad or pure acetone. This step removes invisible body oils and hand lotion residues that block the glue from gripping the keratin.
Prep the Cuticles and Surface
Take your wooden stick and gently push your cuticle skin back away from the nail plate. Never glue an acrylic tip directly on top of your live skin. As your skin naturally sheds cells, the fake nail will lift at the base and trap moisture. Next, take a fine buffer block and lightly scratch the shiny surface of your real nail until it looks white and chalky.
Apply the Best Acrylic Nail Glue
You need the best acrylic nail glue to secure the pieces, preferably an ethyl cyanoacrylate formula with a brush applicator. Spread a thin, even layer of glue across your natural finger surface. Put a small drop of liquid adhesive inside the base of the press-on tip.
Line the fake piece up at a sharp forty-five-degree angle right against your pushed cuticle line. Lower the plastic down slowly onto your finger. This specific movement pushes trapped air bubbles outward before the liquid hardens. Press down with firm, steady pressure across the entire surface for thirty seconds without moving your hand. Avoid washing your hands or applying lotion for two hours to let the bond dry completely.
Once your extensions are solid and filed, you can customize the design easily. You do not have to wear plain, boring colors for three weeks straight. Adding texture to your manicure is a massive fashion trend.
You can buy individual Nail Charms to paste onto your favorite accent fingers. These accessories include tiny metal bows, miniature pearls, and sparkling crystals. Apply a tiny dot of thick gem gel or jewelry adhesive to the center of your nail plate. Place the charm down using tweezers and let the glue dry. This simple addition gives your bargain purchase a luxurious finish.
Safe Removal Methods to Protect Your Natural Hands
Peeling or ripping your extensions off out of impatience will ruin your natural hands. Ripping breaks the bond by tearing away the top layers of your real nail plate, leaving your fingers weak and painful.
If you use temporary adhesive tabs, the removal process is incredibly simple. Soak your hands in a bowl of warm water mixed with dish soap and cuticle oil for ten minutes. Gently rock the plastic pieces side to side until the sticky tape releases its grip. You can store the clean tips back in the box for future use.
If you applied professional liquid glue, you must use pure acetone for removal. Clip away the extra length using a heavy nail cutter. File the top shiny layer of gel polish to let the liquid penetrate the plastic. Wrap each finger in a cotton ball soaked in acetone and seal it with aluminum foil for fifteen minutes. The acrylic will melt into a soft paste, allowing you to wipe it away with your wooden stick.
Frequently Asked Questions
Can you reuse heavy-duty acrylic press-ons?
You can reuse your pieces multiple times if you apply them with temporary adhesive tabs or remove them gently with water and oil. If you soak the set in pure acetone to dissolve professional liquid glue, the chemical will destroy the polymer structure. Melted tips cannot be worn again.
Will these temporary extensions damage my real nail plates?
The application does not cause permanent damage to healthy fingers. Injury only happens during careless removal. If you follow the correct soaking protocols and avoid forcing the tips off your skin, your natural nail plates will remain thick and strong.
Can I file or trim the pieces if they feel too long?
You can easily shorten your tips using a normal clipper or file. If you buy a long set and find it impractical for your job, trim the front edge down to a manageable size. Always file in a single direction to prevent the acrylic layers from splitting apart.
How do modern gel systems compare to these glue-ons?
If you want to understand how these rigid acrylic products compare to full-coverage soft gel systems used in luxury boutiques, we have an intensive comparison guide for you. Read our complete informational breakdown regarding what is gel x nails to learn how modern salon chemistry handles extension lengths and sizing methods today.